Friday, December 25, 2009

Merry Christmas

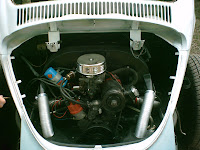
Well its hard to find time to work on the bug when its -4 degrees outside. We where taking some pictures for our 2009 Christmas card and someone thought that we should include a picture of the bug. Jody and I had to lean against the car door to hold it place and not have the kids come spilling out. I figured that I should add the picture on-line.


Hopfully by next Christmas, we can have another picture with it all finished up. Jody thinks that I should paint the car burnt orange ... I'll have to think about that. Should I go with chrome rims or black rims with orange?


On a side note ... I might be able to get painted sooner then later. The guy who I was hoping to paint the car this spring may have an opening for now. I'll know for sure soon.

(Update, Feb 2010 ... the guy who I was hoping to paint the car fell through ... not returning phone calls)

Sunday, October 4, 2009

Paint

Well its been a little while since I've done anything with the bug. I've done a little more small touch-ups on the body and it getting closer to being ready for paint.

The one thing that I've come to realize is that paint is a complicate choice. I really would like to paint the car its final color before I put it all back together, but I also want to get it back on the road. Paint is on a car to protect the metal from the elements which will make it rust. The metal on the car is in great condition for its age and I would really like to keep it that way. That means painting before it gets on the road.

The other thing that I've come to realize is that painting a car the right way costs a lot more money then I have sitting aroung. My goal isn't to have a show quality car but rather something that looks alright and runs well. I would rather spend money on other things like the engine.

I know the basic steps for painting a car but I need help with learning and performing the finer parts of this delicate art.

So far I've thought about painting it with black primer to protect the metal. It gives it that un-finished project look. I could do this myself and start to put things back together and paint the car a final color in the future.

Another thought, is paint it with spray cans. Yep, a "rattle-can" paint job. It would protect the metal and give it a more finished look. The problem that I see with this ... it's probably going to make a "real" paint job more work, which would also add more to the cost.

I also read about using a small roller to paint a car, but I know that I'm not going to do that.

Last week I talked to my father-in-law's friend Kenny who paints cars on his own. Does a great job but he has a project already planned for the winter so he wouldn't be able to get to me until the spring time. Since he does it in his spair time he said it usually takes 2 to 3 months to finish all of the work which means that it would be finished sometime early to mid summer. This is probably my best option because the car will get painted the right way and it will give me a little more time to save some money. He estimates the cost would be around $900 for paint and labor, but can change if things come up.

Fall time is here now and winter will be coming soon. I would really like to drive the car but now is the best time to paint the car while its still in parts ... oh what to do.

Tuesday, September 1, 2009

Stiftung AutoMuseum Volkswagen

I recieved my VW "birth certificate" from Stiftung AutoMuseum Volkswagen in the mail yesterday. I also recieved a letter that states that my current engine isn't the original engine. I suspected it wasn't because it has and AB code and that wasn't used in a super.

Here are what my extra / option codes are. I'm going to try to get more information on them.
M 002 US Equiment
M 290 Mud flaps, rear
M 698 Unknown, Seen on 1973 Beetle
M 699 Unknown, Cannot be identified

Here is a great link from TheSamba.com that has a lot of option codes.
http://www.thesamba.com/vw/archives/info/mcodest1.php


If you own a Volkswagen and would like to know more about its history, you can order an ID certificate here: http://automuseum.volkswagen.de/index.php?id=12&L=1

Wednesday, August 19, 2009

Bondo

Well, its been a couple of weeks since I've done anything on the bug. Last night I just had to sit in it for a few minutes. I figure that I should start it every once in a while to make sure that everything is working.

After running it for a few minutes I decided that I should whip out the bondo and fill in the 2 holes on the bottom corners of the rear window. They patched up nice so far. I've done some basic sanding and scraping on them and will add another layer of bondo in the next day or so.

I'll take pictures when I'm done with the body work.

I found a nice 5 part series for doing body work with Bondo.
http://www.auto-repair-help.com/automotive_videos/bondo_repair.php

Want to know what Bondo is?

"Easy" Aircooled VW mods

"Easy" Aircooled Engine Bolt On Modifications - Getting The Most Out Of Your Stock VW

This article talks generally about suspension, swaybars, shocks, disk brakes, stearing wheels, shifters, Synthetic oil, fuel hoses, points and condensers, distributors, pulleys, CDI, cap and rotor, muffler, rocker arms, flywheels and carbs. The article has a lot of links to more specific items and was updated just a couple of years ago.

http://www.aircooled.net/gnrlsite/resource/articles/mods.htm

Thursday, August 6, 2009

Paint colors ...

Today I changed my mind. Now I'm thinking red, maybe with no bumpers and low profile Porsche rims, or maybe a little more classic look with a white side panel and Empi rims.

Try your own style at Bug Selecta. You can pick a Beetle, Type 3, Bus or Porsche.

Wednesday, August 5, 2009

Vehicle Identity Certificate ...

I ordered a "birth certificate" for my bug tonight, 35 euro's (At today's conversion rate that comes out to $50.43) The certificate is suppose to tell you how it was when it left the factory, like the engine, built date, ship date, destination and extras/options. Who knows what it will really have on it but I thought it would be fun to know.

If you own a Volkswagen and would like to know more about its history, you can order an ID certificate here:
http://automuseum.volkswagen.de/index.php?id=12&L=1

Carb gaskets ...

I had a little time tonight the other night to look at the carb some more, I'm still having the problem of not wanting to idle once its warmed up. A few people have told me to look at the gasket between the carb and intake.


The gasket was sticking out the side, and didn't look real good so I thought that it would be a perfect place to start. When I took the carb off this is what I found...


Nice! They are rubber and look like they where cut out of a bike intertube using a butter knife. I made a new gasket using actual gasket material, but I still get the same results, won't idle when its warmed up enough for the choke to be off.

I think that I'm done with the carb for a little while, I need to start working on the body so that I can get it painted this year.

Monday, July 20, 2009

New parts and rust holes

Here is my pile of parts that all have to get back together to make a functioning car. The car only had 2 places that was more then a spot of surface rust. Both lower corners of the rear window.

Sunday, July 12, 2009

Timing and carb adjustments

The car starts and runs great then its cold. But once the choke gets down to the last 2 notches, the engine won't idle and slowly dies.

I have a 009 distributor (0231178009) with a Pertronix electronic ignition, and I've read that since its a mechanical advance only, that its best to set the timing to 28 - 32 degrees BTDC (going to the right of TDC). I don't have degree markings on my crank shaft pulley so I had to figure out how far 28 - 32 degrees would be. Here is how I figured that out.

Pulley dia. is 7"
pi = 3.1428

7 * 3.1428 = 22" (21.9996")
22" / 360 = .0611" for each degree
.0611 * 30 degrees = 1.8333"

So to find 28 - 32 degrees BTDC, I messure 1.8333" to the right of my TDC, and placed a mark on the pulley.
( I used white finger nail paint, thanks honey! )

I also have read that the 009's are not all calibrated the same, so the max advance on each might very. The best way to get it set is to use a timing light, and rev the engine up until the 30 degree make stops moving. Then rotate the distributor until the mark is lined up to the seam of the engine case. Tighten the distributor screw so that it doesn't move.

Next I need to adjust the carb. I followed the directions on a couple of web sites. I won't describe the entire process, you can check that out at these links.
Rob and Dave's aircooled volkswagen page or VW Tech page (has a picture)

The end result, a nice smooth running engine ... nope! Still runs the same way. Starts and runs fine when its cool, but as soon as the choke gets to the last 2 notches, when left to idle, it dies. When the engine is warmed up, it still starts fine, just won't idle.

Back to the drawing board.

Thursday, July 9, 2009

Vw air cooled YouTube videos - shows and rides

Its alway cool to see videos that people throw toegether about their volkswagens. This is a random list of vides that I found. They are from YouTube and are shows, personal rides, cruises and from all over the world ... I like the range of music! Let me know if you have any vidoes that I should include to the list.

..:: In no particular order ::..

Air-Cooled VW Road Tour
Bug-in 2009 movie
Aircooled VW cruising - Ride
Take a ride in a 59 Bug
A 62 VW - ride
Meeting vw air cooled Vihiers 2008 - Part 1
Meeting vw air cooled Vihiers 2008 - Part 2
Meeting vw air cooled Vihiers 2008 - Part 3
Meeting vw air cooled Vihiers 2008 - Part 4
VW Aircooled Rides & One AD
Erik's bagged 1966 bug
HoodCrew Ride III
lowlife vw meeting 2007

If you know of other cool videos, or you think any of these are lame, comment on this post and let me know, I'll update the list!

Wednesday, July 8, 2009

Headliner glue removal

I found a good way to clean off the headliner glue last night. Using a 50 grit sandpaper disk on a drill. With it spinning at a slow speed, the sandpaper grabs the foam and tears it away without turning it into dust. Once the thicker materital is off, speed the drill up a bit and sand the glue down to the paint / metal.

I was supprised to see how quickly it came off. Its just a little dusty. In the pictures, the glue looks like rust, but its not, its glue.


Sunday, July 5, 2009

Engine timing and carb adjustments

I want to get the carb and timing setup correctly since I don't think anything has been adjusted since the re-build. It starts great, and runs nice, until the engine warms up and the choke kicks off.
The carb is a Solex 34 PICT 3.

I have a 009 distributor, and with the rotor cap off I was able to see that it has a Pertronix electronic ignition. This is nice.

I picked up a timing light from my buddy Mike Cummings last week and hooked it up tonight ... guess what ... the timing is set to 0 degrees. Looks like I'll set the timing and adjust the carb tomorrow.

First oil change

I did the first oil change and valve adustment on the Volkswagen bug tonight. Ran it for 15 minutes at 2,000 to 3,000 RPM. Drained the oil and pulled out the screen while it was still nice and hot. The oil had a few small metal shavings as to be expected for the first change.

Tools used for the oil change. 10 mm socket for the 6 plate nuts. 13/16 in. socket for the main oil plug. (I have a 19 mm socket, but that didn't quite fit)

While the oil was draining, I noticed that the plate had been painted. I think its from the engine heat and oil, but the new paint was starting to flake off in little peices. Not liking this, I used a scraper and some 200 grit sand paper and removed all of the new paint from the inside surface of the plate before I put it back together.

Before adding the new oil I adjusted the rockers tippets to .006 in. They where all real close, but I tweeked them to have a better fit. (My buddy Mike reminded me to do this while the engine is cold, even the slightest bit of warmth may alter the valve clearances.)

Tools used for the valve adustment. Regular screw driver to pop the valve cover holder and for the tippet adjustment. 13 mm box wrench for the retaining nuts. 13/16 in. socket for the generator pully nut to turn over the motor so the appropriate cylinder was at TDC when adusting the valves. I made sure to clean out any oil, shavings or other gunk from the heads while I did my adjustments.

With everything back together I added 2.5 quarts of 10w-40 oil. Ran it for about a minute, checked and added another .25 of a quart. All together I put in 2.75 quarts of oil. No leaks yet ...

Notes: Need to pull the distrubitor cap off to tell which cylinder is at TDC and firing. Also, don't leave your tools under the rear of your air cooled VW when getting the engine warmed up! The cooling air blows out the bottom, everything gets toasty.

Friday, July 3, 2009

Engine break-in

I talked to a few of the guys at the Twin Cities VW Club this week about engine break-in. Since this car has a newly re-built engine, I want to make sure I treat it right in the beginning so that it give me a nice long life. Not knowing if the engine has been broken-in, I'm going to be cautious and treat it like its new and break it in.

Picked up some 10w-40 oil and new drain cover gaskets.

I'll run the engine at about 3000 RPM for 15 minutes and then drain the oil when its still warm. Fill it back up and adjust the valves. Then for the first 300 or so miles I'll do stop-and-go driving mostly. Then drain the oil again. After that I should be good to go for regular oil changes.

Thursday, July 2, 2009

Engine displacement

When you talk to bug guys for a while they frequently throw our engine sizes in CC's. You hear numbers like 1585, 1776, 2110 ... So I wanted to figure out how to calculate the size of an engine. Here is what I found out.

Engine displacement is a measure of the volume of air displaced by an engine. The measure of the distance between piston's top dead center (TDC) and bottom dead center (BDC) is known as the stroke. The measure of the cylinder diameter is known as its bore. Knowing the bore and stroke of an engine and the number of cylinders we can calculate the amount of air/fuel the motor displaces or its' displacement.

The formulas for a cylinder is given as:
Displacement = PI * BoreRadius^2 * Stroke * NumberOfCylinders

For my stock 1600 DP engine, this is what we end up with;

PI = 3.1428
Bore = 85.5 mm
Bore radius = 42.75 mm (85.5 / 2)
Stroke = 69 mm

Now for the math for my stock 1600!
3.1428 * (42.75 * 42.75) * 69 * 4 = 1585.25 CCs

Here are the common air cooled VW engine sizes (bore * stroke)
85.5 mm * 69 mm = 1585 (called the 1600)
87 mm * 69 mm = 1641
90.5 mm * 69 mm = 1776
92 mm * 69 mm = 1835
94 mm * 69 mm = 1914

A stoker motor has a crank shaft that has a larger diameter, which means the piston travels farther with each up and down stroke.
Stroker engine sizes :
90.5 mm * 74 mm = 1904
90.5 mm * 82 mm = 2110
92 mm * 82 mm = 2180
94 mm * 82 mm = 2275
94 mm * 84 mm = 2332

Monday, June 29, 2009

Main Street Auto, Lakeville, MN

If you live in the Minneapolis MN area and have an air-cooled VW, you know that it can be hard to find people who know how to properly service them. Main Street Auto in Lakeville is one such place that can help service your older VW's. They work on other vehicles as well, but they have a passion for older VW's.

Ask for Tony, tell him that Jim sent you.

Main number: (952) 469- 2110
Website: http://www.mainstreetautomotive.com/

Sunday, June 28, 2009

Super Beetle Technical Information

Although they looked the same as previous models, the 1302 and 1303 ‘Super’ Beetles were the most radical reworks of the car during its long life. MacPherson strut front suspension was adopted, which allowed more front boot space (and thus provided the easiest way to tell these cars apart, by their bigger and more rounded bootlid) and improved handling. The struts also allowed front disc brakes to be fitted too. The 1303, from 1972, had a more safety-conscious padded dashboard and wraparound windscreen, plus bigger tail lights.

Performance:
0-60mph: 18.3secs
Top speed: 81mph
Bore 3.36 in. (85.5 mm)
Stroke 2.72 in. (69 mm)
Displacement 96.6 cu. in. (1584 cc)
Compression ratio 7.3 : 1
Maximum output SAE net 46 hp at 4000 rpm.
Maximum torque SAE net 72.0 lb. ft. at 2800 rpm.
Maximum and cruising speed 81 mph

Dimensions and weights:
Length 163.0 in. (4140 mm)
Width 62.4 in. (1585 mm)
Height 59.1 in. (1500 mm)
Ground Clearance 5.9 in. (150 mm)
Unladen weight (ready for use) 1984 lbs.
**Vehicle capacity weight 739 lbs. (335 kg)
Gross vehicle weight 2844 lbs. (1290 kg)
Gross axle weight, front 1190 lbs. (540 kg), rear 1670 lbs. (760 kg)
Permissible roof weight 110 lbs. (50 kg)
Wheelbase 95.3 in. (2420 mm)
Turning circle diameter 31.5 ft. (9.6 m)
Track at front 54.3 in. (1387 mm)
Track at rear 53.6 in. (1364 mm)
Wheels 4½ J x 15 safety rim wheels
Trailer 882 lbs. (400 kg), tongue load 55-88 lbs. (25-40 kg)

Capacities:
Fuel Tank 11.1 US gal, (42 liters; 9.2 lmp. gal.)
Engine 5.3 US pints of engine oil (2.5 liters; 4.4 lmp pints)
Transmission and final drive 6.3 US pints of hypoid oil (3 liters; 5.3 lmp. pints)
Windshield washer approx. 3.6 US pints of fluid (1.7 liter; 3 lmp. pints)

Here are a couple sites with more Super Beetle technical information
SuperKafer
1302 Super
1303 Owners Manual
Wikipedia

Tuesday, June 23, 2009

Interesting ...


Not sure what to say about this bug modification ...

Kinda looks like it was made out of leftover silo parts.

The future?


This is one of my thoughts on what I would like my project to look like in the end. Audi sells the 2009 TT with the grey that I want.

More parts

Just got back from picking up some more parts. The previous owner called me the other day to let me know that he found a couple more boxes of parts, including the door wing windows.

Thursday, June 18, 2009

Getting the glue out

I started working on the bug today. I've removed the radio and speaker wires. I'll put new wires in when I put the new radio in.

Also started on removing the leftover carpet glue from the floor and the leftover glue from the headliner. The carpet glue is kinda thick and rubbery and peals off nice, just takes some time. The headliner glue is a bit harder to get off. I'm going to have to experiment on a good way to get that off.

I'm open to suggestions to make removing the glue easier ...

Sunday, June 14, 2009

New Project - 1973 VW Bug

I've been thinking about a bug (original style not a new one) for a few years and searching around for the last few months. My good friend Mike had a couple bug's, a '69 and '70 and the parents of another friend Chris had one too. Why a bug? Simple ...
  • In this ever increasingly complex world there is something attractive about simple
  • Parts are inexpensive and easily available compaired to other older cars
  • Everyone knows what it is and either owned one or knows some who did
Its actually a super beetle. I was't specifically looking for a super, but when I came across this one I had to get it. New engine and super clean body. The car was originally from Texas, and it has a little surface rust but nothing real bad.

This will be a project, its in a bunch of pieces with now. The transmission and engine are in it and it is driveable, but nothing else is. No glass, no fenders, no hood, no trunk, no doors, no interior other then the driver's seat and the dash board ... but I think that I have most all of the parts in boxes. There are new wheel bearings, new brake drums and shoes, new glass molding ... lots of new parts.

Eric helped me bring it home with his pickup and flatbed trailer. We filled the entire pack of the truck with parts. Brought it home 6/12/09

The engine is a 1600 dual port and is totally rebuilt. It has about 4 miles on it and 3 of them where crusing up and down the road in front of the house. Its nice to have a fresh motor, I'll need to be sure to break it in right.

Friday, June 12, 2009

Monday, June 1, 2009